

Appearance
Workflow History Widget
Designer › Layout › Widgets › Workflow history
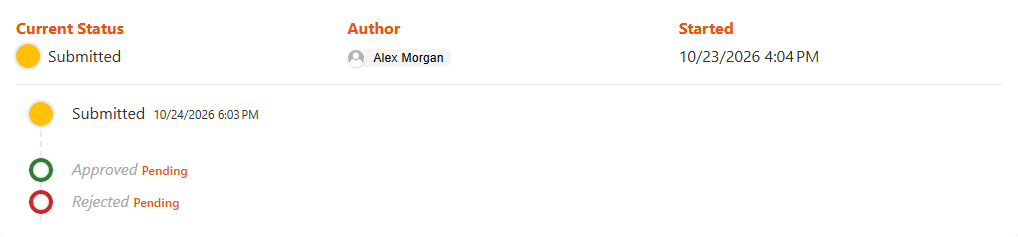
The Workflow history widget shows the path of the item through its workflow: each status it reached, how long it stayed there, and who did which action, with their comments.
Add the widget
- In the Layout tab, open Widgets on the left.
- Drag Workflow history into a section.
- Set its properties, then save the form.
| Property | What it does |
|---|---|
| Statuses | Show only some statuses. Empty: All statuses |
| Display | Everything, Actions only or Statuses only |
| Sort | Oldest on the top or Latest on the top |
| Show Header | The line with Current Status, Author and Started at the top |
| Relative dates | Shows, for example, 2 days ago instead of a date. This is set for the whole form in Settings → Form viewer → Workflow history. Select settings to go there |
In the designer, the widget shows sample data.
What the widget shows
- For each status: its colour, the date the item reached it and the time it spent there (with Display set to Everything). Statuses the item hasn't reached yet are shown in grey, with a label saying they're still to come.
- For each action: its name, who did it, the date and the comment. An action done through the API is marked (automated).
- A signed action shows the signature. An action with Authentication required shows a lock and the person's IP address.
Good to know
- The Workflow History icon in the form's top bar opens the same history in a panel, with all statuses and the oldest first. Settings → Form viewer → Workflow history → Display statuses only shows only the statuses there.
- People outside your organisation don't see the widget or the history panel. To show them the widget, set Workflow history under Widget visibility to Visible, in Settings → External access → External form behaviour. The panel stays hidden for them.
- Without a workflow, the widget says Workflow is not enabled for this form.
Related: Workflow Status Widget, Workflow Actions.