

Appearance
Confirmation Screens
Designer › Settings › Confirmation screens
A confirmation screen is a message users see after they save an item, for example "Thank you, your request number is 42". You can set one for new items and another for existing items.
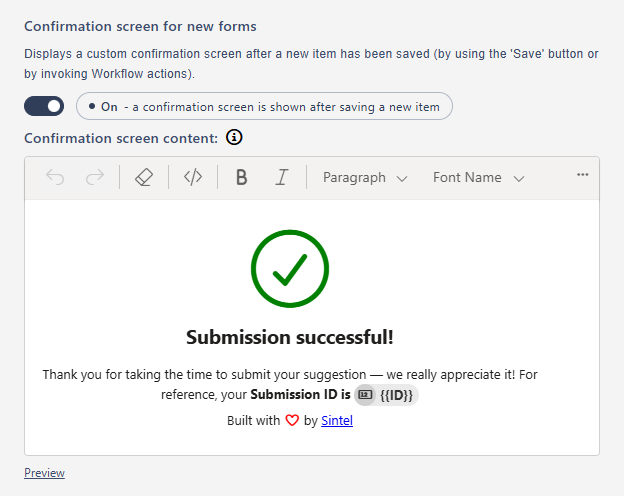
You find them in the designer: Settings → Confirmation screens. Both are off by default, and each comes with a ready-made message (Submission successful! with the item ID) that you can change.
Set it up
- Turn on Confirmation screen for new forms, Confirmation screen for existing forms, or both.
- Write the message in Confirmation screen content. You can format the text. To add a link, use the source code view: the
</>button in the editor's toolbar. - To show a value from the item, type
{{and pick a field. It appears as a small tag in the text. Use{{ID}}for the ID of the item. - Select Preview to see the screen. In the preview, values from the item aren't filled in yet.
- Save the form.
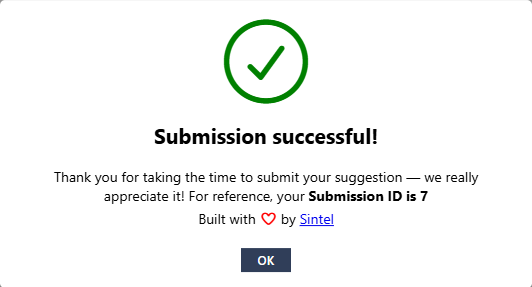
This is what users see with the ready-made message for new items:
When it appears
The screen appears after the user saves the item with Save, Save and Close or a workflow action. External users see it too.
The user selects OK to close it. What happens next depends on how they saved:
- After Save, the form stays open.
- After Save and Close or an action, the form closes and follows the redirect settings.
- External users always leave the form after OK.
Example
For new items:
Request submitted
Thank you. Your request {{Title}} has number {{ID}}. We'll email you when it's approved.
Related: Settings Tab (Overview).