

Appearance
The Workflow Actions API Integration
Designer › Workflow › an action › API Integration
Allow automated submission lets a flow or another system do a workflow action, without anyone opening the form. The item moves to the next status as if someone had selected the action in the Actions menu.
For example:
- A background check comes back clear, and the request moves to Cleared.
- A finance system confirms the payment, and the order moves to Paid.
- A Power App records an inspection, and the form moves to Inspection complete.
Your Sintel Apps licence must include API integration.
Step 1: Turn it on for the action
- In the designer, open the Workflow tab and select the action, for example Approve.
- At the bottom of its properties, under API Integration, turn on Allow automated submission.
- Copy the address next to POST with the copy button.
- Save the form.
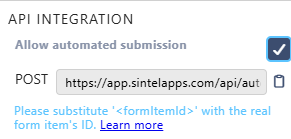
The address looks like this:
text
https://app.sintelapps.com/api/automation/action?itemId=<formItemId>&form=0a1b2c3d-1111-2222-3333-444455556666&site=https%3A%2F%2Fcontoso.sharepoint.com%2Fsites%2FRequests&actionId=7e8f9a0b-aaaa-bbbb-cccc-ddddeeeeffffform is the form's list, site the site, actionId the action. Leave them as they are. Replace <formItemId> with the ID of the item, for example 42, or with a value from your flow.
Step 2: Call it from Power Automate
- Create a flow with the trigger you need. To try it out, use the SharePoint trigger When an item is created on a test list.
- Add the action Invoke an HTTP request from the connector HTTP with Microsoft Entra ID (pre-authorised). This is a Premium connector.
- In the connection, sign in with Microsoft Entra ID and use:
- Base Resource URL:
https://app.sintelapps.com - Microsoft Entra ID Resource URI (Application ID URI):
api://dffccbe7-fe5e-4e9a-abfb-fc70b62d2dae
- Base Resource URL:
- Set Method to POST. Other methods don't work.
- Paste the address into Url of the request, and replace
<formItemId>with the item's ID.
Step 3: Test it
- Make sure the item is in the action's status, for example Submitted for Approve.
- Run the flow, or create an item in the test list.
- In Power Automate, check the flow's run history. The HTTP step should have succeeded.
- Open the item. It's now in the next status.
What must be true for the call to work
The call is checked like a click in the form. It fails when:
- The item isn't in the action's status. For example, Approve works only while the item is Submitted.
- The account isn't allowed to do the action. The flow's connection signs in as a person. That person must be in the action's Audience (or the action is Public), and must not have done this action already in this status.
- Allow automated submission is off for that action.
- The item doesn't exist yet. The API moves existing items only. It can't create one.
- The action was deleted, or the address is from before you saved the form.
- The licence doesn't include API integration, has expired, or is over its item limit.
If the call fails, the HTTP step in your flow shows an error (usually 400) with the reason.
Quorum still applies. One call counts as one person. With People needed 2, one call doesn't move the item.
The call has no body, so it can't send a comment, a signature or field values. The action's Comment, Signature required and input fields are skipped, even when they're required. To change field values as well, update the item first, for example with the SharePoint action Update item in the same flow, then call the action.
What happens after the call
- The item moves to the target status, and the workflow history shows the action by the flow's account, marked (automated).
- Workflow emails go out as usual. Submission emails aren't sent. See Workflow Email Notifications.
- A webhook on the target status runs. See Configuring Power Automate Webhook.
- No comment, signature or field values are sent. The action's input fields aren't asked for. The fields keep what they had.
Related: Workflow Actions, Configuring Power Automate Webhook.