

Appearance
Logic Tab (Overview)
Designer › Logic
The Logic tab controls how the form behaves while people fill it in. With logic you can:
- show or hide fields, sections and tabs,
- make fields mandatory or read-only,
- show your own error messages,
- set field values,
- hide or disable workflow actions, buttons and form features such as Save or PDF export,
- run your own JavaScript.
For example: show a Justification field only when someone orders more than 5 items.
How logic works
Logic is made of rules. Each rule has three parts:
- Conditions: when does the rule apply?
- Steps when conditions are met: what happens then?
- Steps when conditions are NOT met: what happens otherwise?
Create your first rule
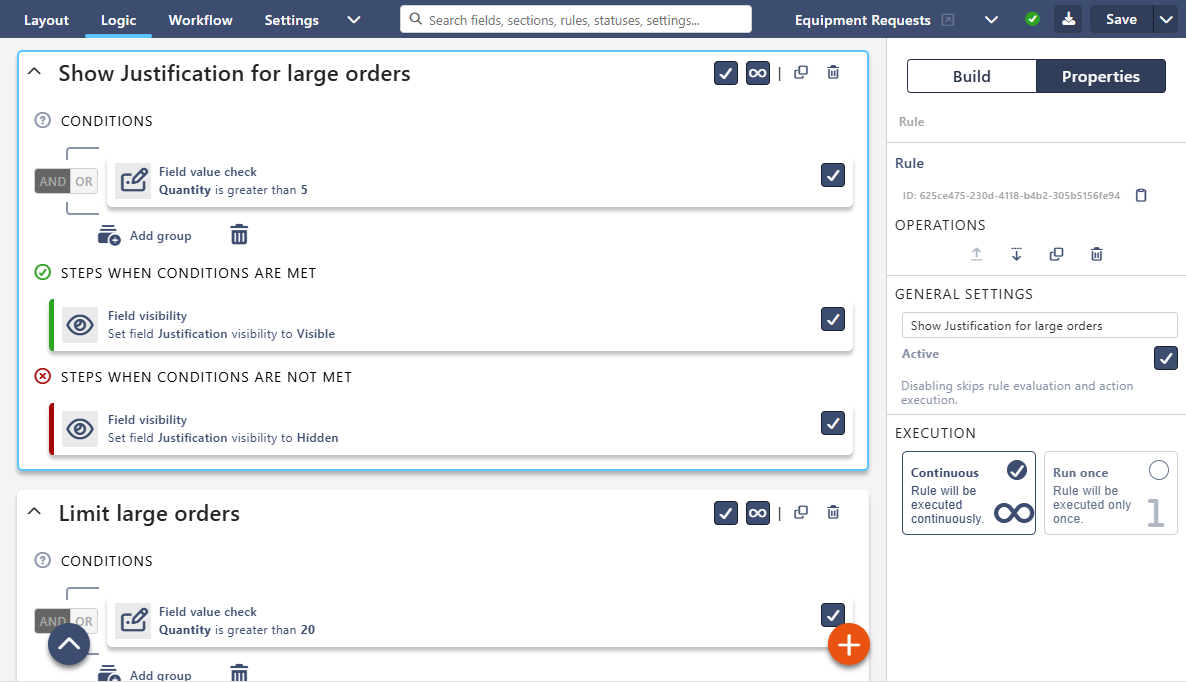
This example shows the Justification field only when Quantity is greater than 5.
You work with two panels on the right. Build lists the conditions and steps you can add. Properties shows the settings of what you selected. On most screens they share one place, and you switch between them with the Build and Properties buttons at the top.
Open the Logic tab. Open your form in the designer and select Logic in the top bar.
Add a rule. Select the orange + button at the bottom right of the rules. A rule called New Rule appears. If a rule is selected, the new one goes below it.
Name the rule. The new rule is selected, and the Properties panel on the right shows its name. Type a name such as Show Justification for large orders. Clear names make the logic easy to maintain.
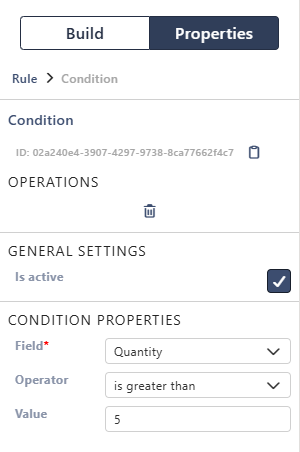
Add a condition. Select Build, open Conditions and drag Field Value Check into Conditions. In its properties, choose the field Quantity, the operator is greater than and the value 5.
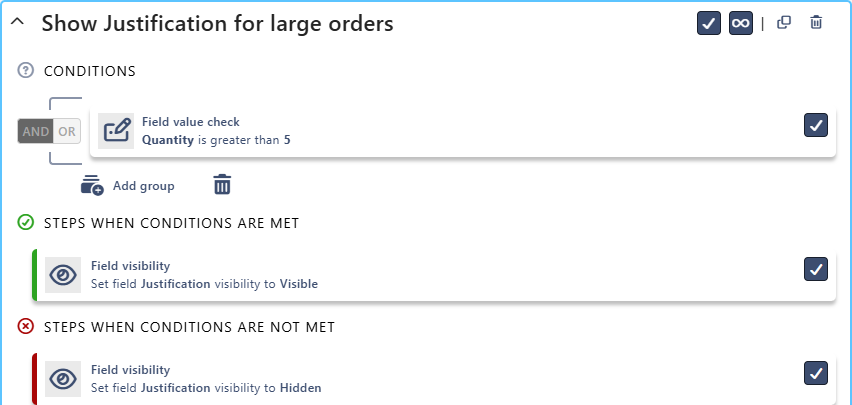
Add the step for "met". In the Build panel, open Steps and drag Field Visibility into Steps when conditions are met. Choose the field Justification and Visible.
Add the step for "not met". Drag another Field Visibility into Steps when conditions are NOT met. Choose Justification and Hidden.
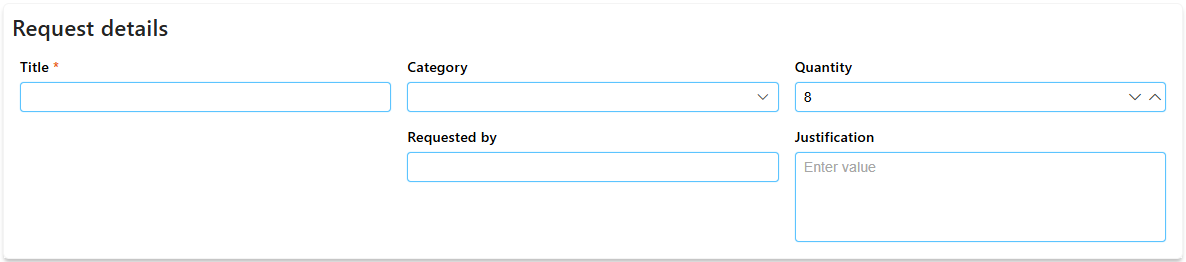
Save the form and test it: type 3, then 8 in Quantity.
The finished rule:
In the form, Justification is hidden while Quantity is 3:

When the user changes Quantity to 8, Justification appears:
To change a condition or a step later, select it and use the Properties panel.
See Understanding Conditions and Understanding Steps for everything you can use.
Rule settings
Select a rule to see its settings in the Properties panel:
| Setting | What it does |
|---|---|
| Name | Shown on the rule card. Use a name that says what the rule does |
| Active | Off: the rule is skipped. Handy for testing. Each condition and step also has its own Is active check box |
| Execution | Continuous: the rule runs when the form opens and again after every change. Run once: the rule runs when the form opens. See Run once in detail |
| Move up, Move down | Change the order of the rules. See How rules run |
| Clone | Makes a copy of the rule, placed right below it and named … - Copy |
| Delete | Deletes the rule with its conditions and steps |
The first two icons on the rule card show the same settings. ✓ means active. ∞ means Continuous, and 1 means Run once. The copy and bin icons clone and delete the rule.
Use Continuous for anything that must follow the user's input, such as visibility, mandatory fields and error messages. Use Run once for one-time setup, such as a default value on a new item. For a default value, add the condition Form Mode = New. Without it, the rule also runs when someone opens an existing item.
How rules run
- When. Rules run when the form opens, after every change on the form, and when the form switches between view and edit mode. They also run in view mode, so a field your rules hide stays hidden when someone only views the item.
- Order. Rules run from top to bottom. If two steps set the same thing, for example the visibility of one field, the later one wins. That is the lower rule, or the later step in the same rule. There are two exceptions. A Continuous rule always wins over a Run once rule, whatever the order. And all custom error messages are shown, not only the last one.
- Back to the designer settings. Each time the rules run, the form starts from what you set in the Layout tab. So when a rule's conditions stop being met and it has no "NOT met" steps, the field or section goes back to its designer setting. For example, Justification is hidden in the Layout tab, and a rule shows it when Quantity is greater than 5. If the user changes Quantity from 8 to 3 and the rule has no "NOT met" step, Justification is hidden again.
- Values stay. Field Value and Section Collapse are different. What they set stays when the conditions stop being met.
- No conditions. A rule without conditions always applies.
Run once in detail
- A Run once rule is checked once, when the form opens. If its conditions are met, its steps run. If not, its "NOT met" steps run. After that, the rule is skipped until the form is opened again.
- It doesn't wait for its conditions. If they become true later because the user changed a field, the rule doesn't run. Use a Continuous rule for that.
- What it did stays. Nothing is undone when its conditions stop being met.
- It can run a second time for the same item. The most common case: a user saves a new item with Save, and the form reopens the item for editing. So make Run once rules safe to run twice. For example, set a default value only if the field is still empty, and add a row to a related list only if the list is empty.
Good to know:
- Run once rules also run again after saving or running a workflow action when the redirect is Form in edit mode or Form in view mode. See After save/action redirect to.
- They don't run again when an existing item is saved with Save, or when the form switches from view to edit mode.
If Logic is turned off in Settings → Features, no rules run. The Logic tab then shows a note with a link to Settings.
Next: Workflow Tab (Overview).